 used to add a new item used to add a new item used to return to the previous screen used to return to the previous screen used to start the batch update process used to start the batch update process used to start the purchase process used to start the purchase process used to add an existing picture or choose it from the camera role used to add an existing picture or choose it from the camera role used to cancel the current action used to cancel the current action used to move to the next step in a process used to move to the next step in a process used to copy an existing trip to a new trip used to copy an existing trip to a new trip used to start the delete process used to start the delete process used to open the filtering of trips or the store, the color also tells you that not filtering is active used to open the filtering of trips or the store, the color also tells you that not filtering is active used to open the filtering of trips or the store, the color also tells you that filtering is active used to open the filtering of trips or the store, the color also tells you that filtering is active use to hide the on screen keyboard use to hide the on screen keyboard used to complete the delete, clear or reset process used to complete the delete, clear or reset process used to save changes in most cases except for receipts or mileage rates which require you to tap the same button on trip edit or mileage type edit screen. used to save changes in most cases except for receipts or mileage rates which require you to tap the same button on trip edit or mileage type edit screen. used to select all rows in the list used to select all rows in the list used to start the report export process used to start the report export process used to restore previous purchases used to restore previous purchases  used to show the main navigation menu used to show the main navigation menu
|
|
|
- Access the Settings Page (tap here to learn how)
- Scroll down to and tap the "Date/Time Format" row.

- Then tap the "Time" row.

- A list of formats will load, you then tap the row with format you would prefer.

|
- First group the trips by business, client, destination, driver, origin, purpose, status, mileage type, vehicle or year and month. Tap here to learn how.
- Next if needed, apply a filter the trips to limit the report. Tap here to learn how.
- Finally, export the report Tap here to learn how.
|
- If you want to add a receipt:
- While adding or updating a trip, scroll down to the "Receipts" section and tap the "Add" row.
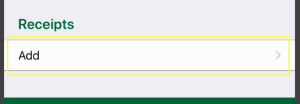
- Next you can choose to take a picture of the receipt or select it from your camera roll if an image already exists.

- In additional to adding the receipt, you can also enter the merchant, total, tax, tips, category, account and notes.


- After entering the details, tap the button to commit your changes or tap the button to lose any changes.
Note: you still need to save the trip.

- Once saved, the Trips screen will display the count of receipts for each trip

- To update a receipt
- Scroll down to the "Receipts" section and tap the receipt

- Then update the receipt by tapping the button on the toolbar at the bottom.

- After entering the details, tap the button to commit your changes or tap the button to lose any changes.
Note: you still need to save the trip.
- To delete a receipt
- Scroll down to the "Receipts" section and tap the receipt
- To delete the receipt tap the button on the toolbar at the bottom

Note: you still need to save the trip.

When you export your trips, all receipts for those trips will be included in a single yet separate file from the report of your trips.

|