- Access the Settings Page (tap here to learn how)
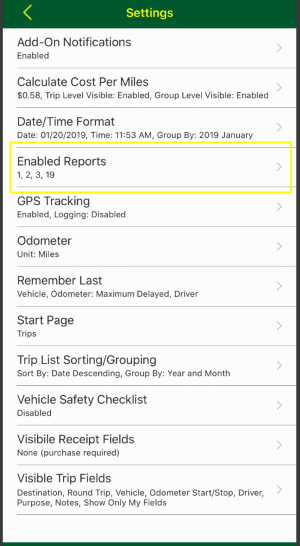
- Scroll down to and tap the "Enabled Reports" row.
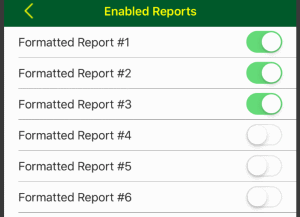
- For the formatted reports you want to enable, change the toggle switch to the
 state. For the formatted reports you want to disable, change the toggle switch to the state. For the formatted reports you want to disable, change the toggle switch to the  state. state.
|
|
GPS tracking is a feature that can be added by following these steps:
- Access the TMM Store (tap here to learn how)
- Scroll down to the "Single Items" section and tap on the "Add Mileage Tracking by GPS" row but if you want to see any discounted bundles that include this add-on then:
- Tap the
 button in the upper right corner to open the store assistant button in the upper right corner to open the store assistant
- Then scroll down to and tap the GPS Tracking row
- Next tap the
 button to return to the filtered store listing button to return to the filtered store listing
- Finally tap the add-on you are interested in from the bundles or single items section
- The details page will open where you can read more about add-on and view screenshots. When you are ready to make the purchase then tap the
 button in the upper right corner and follow any prompts provided by Apple to complete the purchase. button in the upper right corner and follow any prompts provided by Apple to complete the purchase.
|
|
Depending on the version of iOS on your device, the device itself and available services, Track My Mileage takes advantage of Location Services which uses a combination of cellular, Wi-Fi, Bluetooth, and GPS to determine your location.
Note: Continued use of GPS running in the background can dramatically decrease battery life.
For devices running iOS 4:
- iPod touch uses only Wi-Fi for Location Services (if a Wi-Fi network is available).
- GPS is not available on original iPhone or iPad Wi-Fi.
- iOS devices sold in China may use the term Wireless LAN (WLAN) instead of Wi-Fi. Not all China iPhone models support WLAN.
- If you're not within a clear line of sight to GPS satellites, your device can determine your location using Wi-Fi. If you're not in range of any Wi-Fi, your device can determine your location using cellular towers.
For devices running iOS 5:
- iOS devices without a cellular connection only use Wi-Fi for Location Services (if a Wi-Fi network is visible).
- GPS is available on iPhone and iPad Wi-Fi + 3G models.
- iOS devices sold in China may use the term Wireless LAN (WLAN) instead of Wi-Fi. Not all China iPhone models support WLAN.
- If you're not within a clear line of sight to GPS satellites, your device can determine your location using crowd-sourced Wi-Fi and cell tower locations.
For devices running iOS 6:
- iOS devices without a cellular connection use only Wi-Fi for Location Services (if a Wi-Fi network is available). At some time the app may rely on a Wi-Fi connection for region monitoring. If a device is passcode locked, this feature may be limited or inaccurate.
- GPS is available on iPhone and iPad Wi-Fi + 3G models.
- iPad (Wi-Fi + Cellular models): Verify that Cellular Data is on in Settings > Cellular Data, even if you aren't subscribed to a cellular data plan. This will allow your device to more accurately calibrate itself using network time and location information. In some instances, disabling a SIM PIN may be necessary.
- iOS devices sold in China may use the term Wireless LAN (WLAN) instead of Wi-Fi. Not all China iPhone models support WLAN.
- If you're not within a clear line of sight to GPS satellites, your device can determine your location using crowd-sourced Wi-Fi and cell tower locations.
For devices running iOS 7 and newer:
- iOS devices without a cellular connection use only Wi-Fi for Location Services (if a Wi-Fi network is available). At some time the app may rely on a Wi-Fi connection for region monitoring. If a device is passcode locked, this feature may be limited or inaccurate.
- GPS is available on iPhone and iPad Wi-Fi + 3G models.
- iPad (Wi-Fi + Cellular models): Verify that Cellular Data is on in Settings > Cellular > Cellular Data, even if you're not subscribed to a cellular data plan. This will allow your device to more accurately calibrate itself using network time and location information. In some instances, disabling a SIM PIN may be necessary.
- iOS devices sold in China may use the term Wireless LAN (WLAN) instead of Wi-Fi. Not all China iPhone models support WLAN.
- If you're not within a clear line of sight to GPS satellites, your device can determine your location using crowd-sourced Wi-Fi and cell tower locations or iBeacons.
Improving GPS accuracy
GPS accuracy varies depending on the number of visible GPS satellites. Locating all visible satellites can take several minutes, with accuracy gradually increasing over time. Use these tips to improve GPS accuracy:
- Ensure the date, time, and time zone are correctly set on the device in Settings > General > Date & Time. If possible, use Set Automatically.
Important: Incorrect settings on your computer can sync to your device. Verify the date, time, and time zone on any computer that syncs with your device.
- Verify that you have a cellular or Wi-Fi network connection. This allows the Assisted GPS (A-GPS) on the device to locate visible GPS satellites faster, in addition to providing initial location information using the Wi-Fi or cellular networks.
Note: Microcells (sometimes called Femtocells) aren't supported with Location Services.
- Maintain a clear view of the horizon in several directions. Keep in mind that walls, vehicle roofs, tall buildings, mountains, and other obstructions can block line of sight to GPS satellites. When this occurs, your device will automatically use Wi-Fi or cellular networks to determine your position, until the GPS satellites are visible again.
- Restart your device.
Crowd-sourced Wi-Fi and cellular Location Services (iOS 5 and newer)
If Location Services is on, your device will periodically send the geo-tagged locations of nearby Wi-Fi hotspots and cell towers in an anonymous and encrypted form to Apple to augment Apple's crowd-sourced database of Wi-Fi hotspot and cell tower locations. In addition, if you're traveling (for example, in a car) and Location Services is on, a GPS-enabled iOS device will also periodically send GPS locations and travel speed information in an anonymous and encrypted form to Apple to be used for building up Apple's crowd-sourced road traffic database. The crowd-sourced location data gathered by Apple doesn't personally identify you.
|
|
Note: Continued use of GPS running in the background can dramatically decrease battery life.
First, read the Improving GPS accuracy section in the How does GPS Tracking work help item.
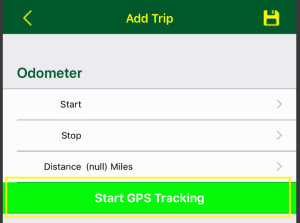
To start tracking, add or update a trip then scroll down to the Odometer section then tap the Start GPS Tracking row. Doing this will clear any existing odometer start, stop or distance entered manually.
To stop tracking, tap the Stop GPS Tracking row or the  button or tap the button or tap the  button. button.
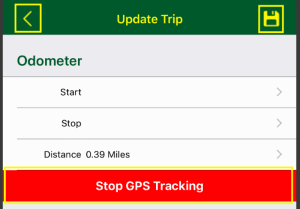
If the trip has already been tracked by GPS you can resume tracking from the last captured position by tapping the Resume GPS Tracking row
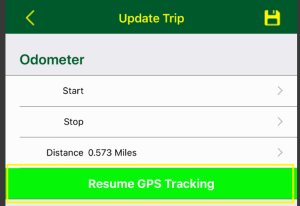
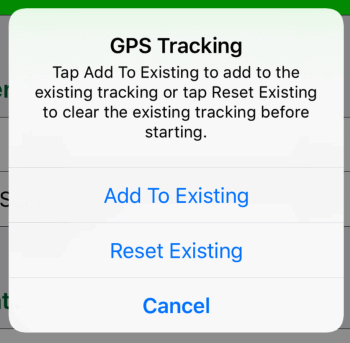
You will be given the option to continue from the last captured position by tapping the Add To Existing button or you can clear the previous tracking and start fresh by tapping the Reset Existing button.
While the trip is being tracked by gps, it is automatically saved periodically, so you can edit any of the fields except the odometer start, stop or distance. But we recommend when you are done with tracking your trip mileage by gps that you tap the Update button to assure the latest trip information is saved.
Also to ensure the best mileage tracking by gps, you should remain on the edit trip page in the app.
This is not to say you cannot answer a call, check your email or start another app because Track My Mileage should continue to run in the background but depending on the settings on your device it may not and since the operating system may terminate the app when it is in the background, we recommend keeping Track My Mileage as the active app as much as possible.
|
|
Batch update allows you to update multiple fields for multiple trips with the same values all at once instead of having to update each trip individually. For example say you have 20 trips with the status of submitted for reimbursement but you need to update some or all to a status of paid. With batch update all you need to do is select the trips you want to update then set the status to paid then save your changes.
Below are the general steps to using batch update:
- From the Trips screen, tap the
 button on the toolbar at the bottom of the page button on the toolbar at the bottom of the page

- Next select the trips you want to update, then tap the
 button button
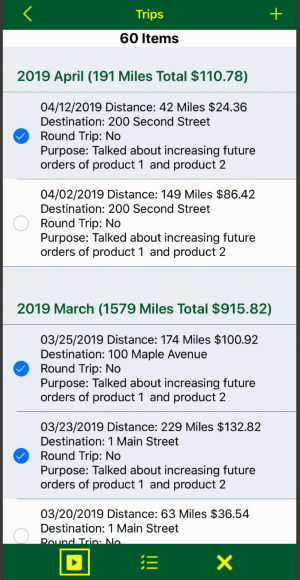
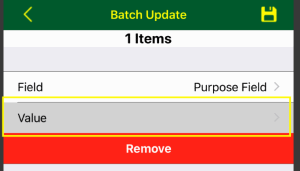
- Then tap the Fields row, then tap the row with the field you want to update
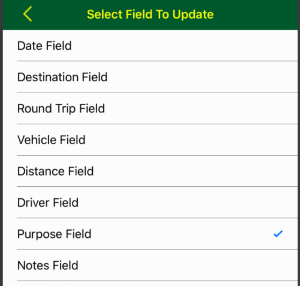
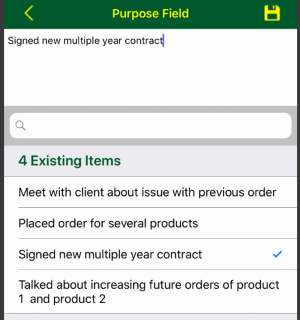
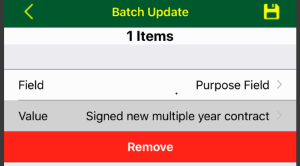
- Next, tap the Value row and enter the value or use one of the other options which is specific to the field you selected
- If you need to update multiple fields tap the
 button on the toolbar at the bottom and follow the previous steps. button on the toolbar at the bottom and follow the previous steps.

- To delete a field, tap the Remove row

- To perform the batch update, tap the
 button in upper right corner button in upper right corner

|